Synology NAS external access: Why is QuickConnect slow?


A few days ago I was at my hometown helping someone configure a NAS. The phone was on 4G; I opened DS file to look through photos taken last year for a relative, and the progress bar moved as if it were loading a browser game. He asked me whether the home broadband upload was too small and whether it should be upgraded. I said don't rush to spend money—this spinning may have nothing to do with the broadband at all.
Similar questions actually come up every month. With the same Synology NAS and the same QuickConnect ID, some people find it as fast as sitting at home, while others lag so much they want to give up remote access entirely—this is not luck, nor is Synology secretly throttling. The answer is written in the official white paper; it's just that no one usually bothers to read that document.
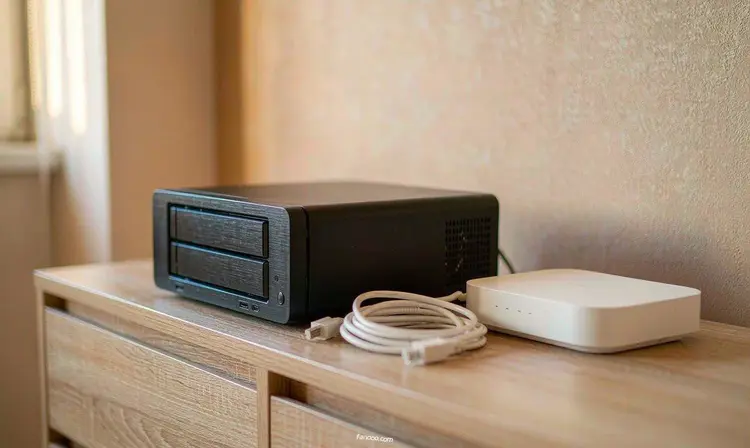
It is not throttling; it is split into three legs.
Synology's QuickConnect white paper describes the process of establishing a connection as three steps, tried in order, stopping on success:
- LAN/WAN detectionThe client first requests from the QuickConnect server the network information registered for this NAS (public IP, LAN IP, NAT type, etc.), and connects directly if possible. When this step succeeds, the speed is no different from accessing directly via IP or DDNS.
- Hole punchingIf direct connection fails, the NAS and the client each open a temporary port on their own NAT, the server exchanges the "hole" information of both sides, and afterward traffic travels point-to-point. The official description of this step is that performance is very close to going through WAN IP/DDNS.
- RelayIf both previous steps fail, data is first sent to Synology's relay server and then forwarded by it to the NAS. The white paper's wording is roughly that this introduces noticeable data transmission latency, so it is placed last as a fallback; the DSM technical specifications page also states that relayed connections may be slower than port forwarding because the path is longer, and in addition, carrier restrictions in some regions can make relay simply unusable.
Therefore, the real structure of "QuickConnect is slow" is this: by default it tries its best to give you a direct connection, and only degrades when direct connection fails. If yours is slow, it means you have fallen to the third leg—not that it is throttling you.

How to know which leg you have fallen to
The official UI does not directly mark "you are currently on a relay"; at least I have not found such a display in DSM, so you can only infer it from symptoms. The following three criteria are ones I commonly use; they are empirical rather than official.
- Under the same Wi-Fi, does DSM open instantly via the QuickConnect ID? If yes, the first leg is working normally, and the problem only appears after "leaving home."
- When transferring a large file, is the speed noticeably lower than your home broadband'suplinkUplink is already the ceiling for this type of access, and relay adds another layer of indirection; the two combined make people think the hard drive or NAS performance is inadequate.
- Does the result differ a lot when switching networks? Mobile data can connect but the company network cannot, or vice versa—this is a typical manifestation of hole-punching success rate being affected by NAT type, and it has nothing to do with the NAS itself.
The third point is especially worth remembering. Many corporate networks and some carrier networks have strict policies on UDP and non-standard ports; hole punching almost always fails, leaving relay as the only option—in such an environment, it makes no difference how expensive a NAS you switch to.
Where QuickConnect is in DSM, and which two options to change
The path is "Control Panel > External Access > QuickConnect" (DSM 7). Check Enable, fill in a globally unique ID, and that's it. Users in mainland China access the quickconnect.cn domain in the browser—the official help documentation specifically has a line "Mainland China is QuickConnect.cn/example"; overseas it is quickconnect.to.
On the same page, there are two places worth clicking into and taking a look at:
- Application permission listQuickConnect does not apply to all services; the official specifications page explicitly states that third-party apps are not supported, and some packages that must directly map IP or DDNS cannot work. Keep only the one or two in the list that you will actually use remotely, and turn off the rest—one less enabled is one less entry point reachable from outside.
- Automatic port forwardingThe official specifications describe it as automatically applying the required port forwarding rules on UPnP-compatible routers. My advice is not to enable it: the value of QuickConnect lies precisely in not having to open holes in the router, while this option, to make you connect faster, will instead open holes. Wanting speed is understandable, but that amounts to handing the decision of "whether to expose ports" to a checkbox.
The other three routes, and where each switch is
1. DDNS plus port forwarding: the most tangible speed, with the prerequisite of a public IPv4
"Control Panel > External Access > DDNS"; select Synology as the provider and you get a free xxx.synology.me; you can also conveniently check the Let's Encrypt certificate and Heartbeat (offline alert). Port forwarding is in "Router Configuration" in the same place; a UPnP router can fill it automatically; if it cannot, log in to the router manually.
What blocks most people on this route is not the settings but the prerequisite: after dial-up on a home broadband connection, what you get may not be a public IPv4 but a carrier-grade NAT address starting with 100.64; in this case, no matter how the port is mapped, it will not work. The method for determining this and several ways out I discussed inthe post on changing the ONT to bridge modeand will not repeat the detour here.
2. Reverse proxy: expose only one 443 externally
In DSM 7, the path is "Control Panel > Login Portal > Advanced > Reverse Proxy Server" (in the DSM 6.2 era this feature was under "Application Portal"). It solves the problem of "multiple services under one domain": externally open only 443, internally forward by subdomain to different ports, with DSM, Photos, and Drive each having its own address, and no need to put 5000/5001 on the public internet.
In a rule, you can check HSTS (applies only to the source side), and you can also attach an access control profile to allow or deny by source IP or subnet. There is a pitfall explicitly stated in the official documentation: enabling access control and a Let's Encrypt certificate at the same time may cause automatic certificate renewal to fail. The official documentation also gives the handling order if it actually happens—first turn off access control, manually renew on the certificate page, then turn it back on. Details like this are impossible to think of without reading the documentation.
3. Site-to-site networking: the most hassle-free proper route when there is no public IP
Synology itself has a VPN Server package, supporting standard protocols such as L2TP/IPSec and OpenVPN; for those who do not want to touch the router or study ports, using a third-party networking tool to "pull" the external device back into the home network is also fine. This route follows the idea of "device networking" rather than "service exposure"; it is the most beginner-friendly, at the cost of installing one more client and having one more thing to maintain.
Once remote access is enabled, do these five things first
Once it can be accessed from the outside, it is no longer just that machine in the living room. The following five points all have original text in Synology's official documentation; they are not my invention:
- Don't expose the DSM management port directly to the public internet.The defaults are 5000 (HTTP) and 5001 (HTTPS). Synology's hardening recommendations also emphasize opening only the service ports that are actually needed on the router. For remote management, go through reverse proxy 443, or simply use networking or QuickConnect.
- Auto Block: "Control Panel > Security > Protection > Auto Block". If the same IP exceeds the login failure limit within the set time, it is blocked; the official scope listed includes SSH, FTP, WebDAV, DSM login, etc.
- Account Protection plus two-factor authentication. Account Protection is under "Security > Account", and two-factor authentication is under "Personal > Security > Two-Factor Authentication"; either Synology Secure SignIn or Google Authenticator works. These two are the last line of defense against "password being cracked".
- HTTPS and certificates. Under "Login Portal > DSM" there are two options, "Automatically redirect HTTP to HTTPS" and HSTS; the official documentation explicitly says not to check both at the same time, or there will be connection issues.
- Changing the default port reduces noise, but it is not a security boundary.The official hardening checklist includes changing ports; its main effect is to evade automated scripts that only scan default ports; people scanning seriously can still find it. The real boundary is the two things: not exposing it and strengthening authentication.
My judgment: which category you belong to
There are three types of people, and the answers are pretty clear-cut.
Use it three to five times a year, only wanting to temporarily view a photo or download a file when outside—QuickConnect is enough; don't overcomplicate. Its greatest value to you is not speed, but "nothing needs to be configured, and it won't leave your own door open."
Want to watch 4K original discs outside, back up phone albums, or use DSM packages as office tools—The relay can't handle it; you need to find a way to leave the third segment. If you have public IPv4, use DDNS plus reverse proxy; if not, consider IPv6 or remote networking. There is also an easily overlooked ceiling here: no matter which path you take, the speed of reading home files from the external network will not exceed your home'supstream. For a broadband with gigabit downstream and 30M upstream, pulling files from outside feels like 30Mbps, which has nothing to do with NAS performance—I did the math inthe upstream articlewas calculated in that article.
tinkerers and people who need to connect multiple devices—you can set up your own relay machine with a public IP and manage the tunnels in one place. The trade-off is swapping "convenience" for "one more machine to maintain and renew"; whether it is worth it depends on how much your time is worth; if you really want to do it, for how to choose the configuration, seethis page on how to choose a cloud server。
This article is just the beginning; there are four more after it.
"Synology NAS external access" cannot be covered in one article, so I split the rest into separate pieces: how to get IPv6 working step by step (the three parts: ONT/optical modem, firewall, and DDNS), how to choose a reverse tunnel/port forwarding solution when there is no public IP, how dangerous it really is to expose management ports to the public internet, and whether QuickConnect is worth keeping long term.
If you are still at the step of "how to calculate the cost of each of the four options," first readHow to choose NAS remote accessthat article; it is about cost, barrier to entry, and exposure surface; this article is about "where exactly to click on the Synology machine in front of you."
This article is compiled based on the official Synology "QuickConnect White Paper" (three-stage connection mechanism and relay explanation), the "Synology NAS External Access Quick Start Guide" (2026-06-05 updated version), the security chapter of the "Synology NAS User Guide 7.4", the official "How to Enhance Synology NAS Security", and the DSM technical specifications page. For UI paths and package availability, refer to the DSM version on your own machine; "how to determine which stage is being used" is personal experience, and the official documentation does not provide a UI indicator.
Advertisement · This article contains promotional links
To start tinkering, you first need a machine.
The commands and services below all require a server that stays online long term.
Alibaba Cloud server promotion entry →
If you are not sure what configuration to buy, read this first:How to choose a personal cloud server (configuration, bandwidth, renewal price)
If you purchase through this link,I will not charge you any extra fees(the promotional commission is settled by Alibaba Cloud); the price displayed on the order page is the actual amount paid. Model, price, and campaign rules are subject to what is displayed on the Alibaba Cloud page; this article does not promise any discount level and does not constitute purchasing advice.