How to choose NAS remote access: calculate the costs of the four options first


A few days ago, a friend asked me on WeChat: he was back in his hometown and wanted to use his phone to pull up photos of his kids stored on the NAS at home, but the App kept spinning and couldn't connect. I said the machine wasn't broken—it was "how to connect back home from outside"; he had never thought about it when he bought the NAS.
I've encountered this kind of problem too many times in the past two years. When everyone picks a NAS, they stare at drive bays, CPU, memory; after setup, what they use every day is actually the ability to "get home files when not at home." And there's no standard answer, only several paths each with tradeoffs. This article puts the tradeoffs of four mainstream paths together and compares them. Here's the conclusion first:For most families, starting with the vendor's built-in relay is enough to try; if not enough, move up. Don't go straight for public direct connection from the start.
First, get one thing straight: why home devices cannot be connected to by default
The address your home broadband gets is very likely not a "public address" that can be directly exposed to the outside, but an address inside the carrier's large internal network, commonly called NAT or CGNAT. IPv4 addresses were allocated long ago, and there are so many home broadband users that what carriers give by default is often an internal address. Outside devices can't get the real address, so naturally they can't get in.
So to let the outside connect in, there are only two directions: either find a way to "relay" requests into the internal network, or make home devices actively "connect out" to rendezvous with a machine that is already on the public network. The four solutions below are, in the end, different implementations of these two paths.
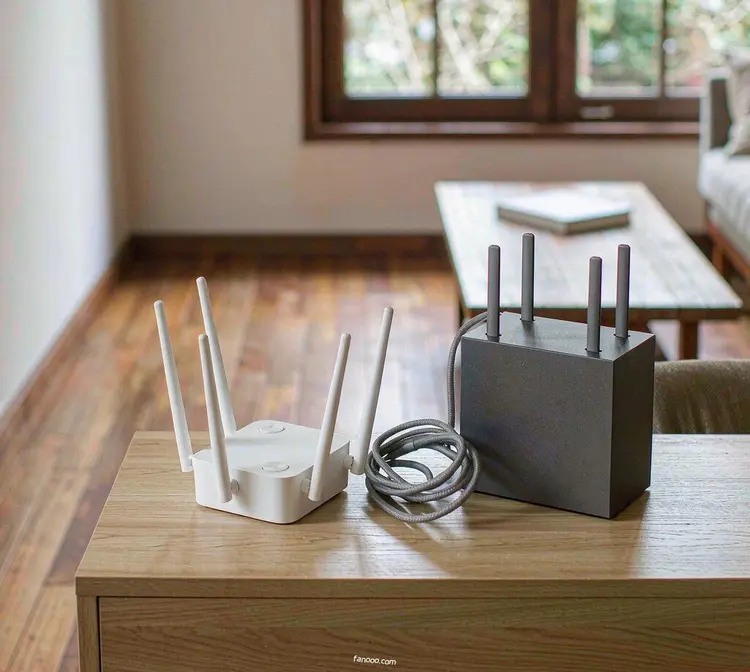
Solution 1: public address + DDNS, or direct IPv6 connection
This is the theoretical ceiling solution. Have the carrier give you a public address, then use DDNS to bind the changing address to a domain name, and from outside connect directly to that domain name to get home.
Speed: no relay in between, can saturate your home broadband's upstream. Note it's "upstream"—many people only look at downstream, but when pulling files from home from outside, what gets bottlenecked is exactly that narrow upstream pipe. I calculated this point separatelyin the "3000M broadband has arrived" articlethere.
Cost: a domain name, from a few yuan to tens of yuan a year, subject to the registrar's current price.Barriermedium: the difficulty is not configuration, but whether you can get a public address itself—carrier policies vary by region; in some areas, personal home broadband basically no longer provides public IPv4, and in others you need to call to apply or get a specific plan.
Security: the one with the largest exposure surface among the four paths. Once a device is directly exposed on the public network, it will soon be targeted by scanners all over the world.Mapping one port out is equivalent to moving this home machine onto the street; attack and defense depend entirely on your own configuration.Before you start, at least firstthe ONT-to-router linksort it out; don't casually expose the admin backend as well.
If you can't get public IPv4, you can first look at IPv6. In many areas, home broadband now assigns IPv6 addresses by default; binding to a domain name with DDNS can also provide direct connection, and speed is basically lossless. The trouble is "both ends must have it": accessing via mobile data usually has IPv6, but the company network may not; if the access end doesn't have IPv6, this path is cut off on the spot.
Solution 2: use the vendor's built-in relay (QuickConnect, UGREEN Cloud, Zspace, FN Connect)
Each NAS system basically comes with a "zero-configuration remote access"; the principle is largely the same: your NAS and the vendor's relay server maintain a long connection; when you log in to the vendor account from outside, requests are forwarded by the server, and data also makes a detour through the server.
Speedlimited by vendor server bandwidth, not the upper limit of your home broadband. The free tier is usually only enough to view albums and temporarily fetch small files; expecting it to stream video remotely is basically unrealistic.Cost: the free tier can handle emergencies; whether it's enough depends on what you do—fnOS FN Connect's remote access service began charging from July 2025, which also shows that the free tier of this path will sooner or later hit its boundary.Barrierlowest: usable after logging in to an account.Security: no inbound ports are opened, so the exposure surface is small; this is its biggest advantage, at the cost of data passing through vendor servers.
There is also an easily overlooked point: this type of relay usuallyOnly covers the few built-in apps of the vendor itself(Files, Photos, Sync, and Videos). If you install other services yourself on the NAS with Docker, those are all out of scope. So when choosing a machine, if you already plan to tinker with self-hosted services, think this through in advance—the machine's "openness" affects what you can do later more than the specs; I mentioned this inthe "How to Choose a Home NAS" articleas well.
Option 3: remote networking, bringing outside devices into the same virtual LAN
This path has been the hottest in the past two years; representatives are Tailscale, ZeroTier, and the newer EasyTier. The principle is to assign each device a private address so that, even across vast distances, they look like they are plugged into the same switch.
There is an essential difference worth knowing: Tailscale is based on WireGuard, works at the network layer, and manages IP packets; ZeroTier is more like simulating a Layer 2 virtual switch, so it can carry Layer 2 traffic such as broadcast, and even old methods like Wake-on-LAN can work. EasyTier is a newer open-source option focused on decentralization.
Speed: Once peer-to-peer direct connection is established, it can saturate your home uplink and is on par with direct public-network connection; when it cannot be established and is forced to go through a relay, speed drops.Cost: The free tier is usually enough for home use; specific quotas and policies are adjusted by each vendor at any time, subject to official terms.BarrierMedium; you need to install a client on the NAS, and when problems occur you have to read docs and search the community yourself.
Here is a key point for the experience in China: the coordination servers and fallback relay nodes of such tools are mostly overseas; once direct connection fails and traffic detours to an overseas relay, latency and jitter will noticeably worsen.So your actual experience depends largely on the success rate of "establishing direct connections" on your own network, and this depends on the ISP, NAT type, and even the time of day, so it is hard to generalize. By the way, after IPv6 becomes widespread, the success rate of this kind of networking has actually improved; if you want to first understand your home uplink and network foundation, you can reviewthe 10-Gigabit broadband articlefor the several aspects discussed in it.
Option 4: build your own tunnel, rent a public-network server as a relay
If the services you need go beyond those built into the NAS, and you do not want to expose home ports, you can consider renting a cloud server with a public address, letting the NAS actively connect out, with external access forwarded through this server. A common practice is to use tunnel tools such as frp, with the server side placed on the cloud server.
SpeedLimited at both ends; it depends on both the cloud server's bandwidth and the home uplink, and whichever end is narrower becomes the bottleneck.CostIt is the monthly fee of a lightweight cloud server; a cheap one costs tens of RMB per month, depending on configuration and vendor promotions, subject to the official current price.BarrierThe highest among the four paths; both the server side and client side must be configured by yourself, and you are also responsible for security.Securityis better than direct public-network exposure, because home devices themselves do not appear on the public network; the cloud server stands in front; but that server becomes your responsibility, requiring hardening and timely updates.
When choosing a cloud server, do not only look at ad slogans like "how many cores and how many GB"; the key is bandwidth and traffic quota, because the speed ceiling of this path is basically determined by them. For how to choose, I haveon the cloud server purchasing pageorganized a set of comparison criteria.
Four options, viewed side by side
| Option | Speed ceiling | Cost | Barrier to entry | Security exposure surface |
|---|---|---|---|---|
| Public address + DDNS / IPv6 | Saturates home broadband upstream | Domain fee, very low | Medium (the public address itself is hard to obtain) | High (devices directly exposed to the public network) |
| Vendor-provided relay | Limited by vendor server bandwidth | Free tier for emergencies; speed tier charged separately | Lowest, zero configuration | Low (no inbound ports opened) |
| Site-to-site networking | Saturates upstream when direct; speed drops when relayed | Free tier is usually enough for home use | Medium; a client must be installed on the NAS side | Low (no inbound ports) |
| Self-built tunnel | Limited by both cloud server bandwidth and home upstream | Monthly fee for one cloud server | High; you need to know how to configure and harden it | Medium (server security is on you) |
There is no absolute “which is better” in the table, because it is never decided by you, but by several conditions you cannot control: whether your home can get a public address, what you mainly use it for, and whether you are willing to tinker with it yourself.
So how should you choose
- Only want to occasionally take a look at files and photos from outside: Use the vendor-provided relay first; zero configuration; if it is enough, stop tinkering.
- Need to watch videos and transfer large files remotely: Add another route besides vendor relay: either public direct connection (including IPv6) or site-to-site networking; the speed ceilings of both are of the same order of magnitude.
- Many devices, and also need to access self-hosted services: Site-to-site networking is more worry-free; just pull each device into the same virtual network.
- Do not want to expose home ports, and need multiple services: Use a self-built tunnel, with one cloud server in front.
- Care about privacy and do not want data to pass through someone else's server: Use public direct connection or site-to-site networking, and keep data point-to-point as much as possible.
A common experience: for most households, the order is “first try whether vendor relay is enough; if not, move on to networking; only then consider public direct connection and self-built tunnels.” Conversely, opening public ports from the start just to “run at full speed” is often digging a pit for yourself.
After it is turned on, these are the things to pay more attention to than speed
Before the National Day holiday, public security authorities issued a reminder on preventing telecom and online fraud (China Economic Net, October 3, 2026), which specifically mentioned one type of tactic: scammers impersonating customer service and inducing you to download an App with "screen sharing, remote control" functions. This type of risk is not the same as self-hosted personal remote access, but the principle is similar—Remote control itself is neutral; the problems come from "what tool is used" and "how much permission is granted."
A security reminder about remote control software issued by the Ministry of State Security (reported by CCTV reporter Wang Li) also put it bluntly. I’ll relay a few points relevant to home scenarios:
- Don’t use obscure remote control software of unknown origin. Such software often lacks formal security qualifications and encryption protection; some even carries a backdoor at the installation stage, and you don’t even know when it transmits data out.
- Opening device permissions all the way at once for convenience and not watching throughout is equivalent to opening the risk all the way at once. After device binding and login authorization, even if this connection is disconnected, background permissions may remain.
- Regularly check installed software and the authorization list; if you find unfamiliar remote tools or unrecognized authorization records, immediately uninstall them, revoke permissions, and change passwords.
Applying this official guidance to the home NAS, I would watch these items: keep the system updated (patches often fix vulnerabilities that can be exploited remotely); do not expose the admin backend entirely to the public internet; if you really need to open it, expose only the one path or port that must be used; if unsure, route everything through a tunnel or mesh network first; change default accounts, do not use weak passwords, and enable two-step verification if possible; create a separate account for remote access and grant least privilege—where read-only is enough, do not grant write permission; regularly check login logs and authorized devices; unfamiliar IPs, unfamiliar devices, and times you don’t remember should all be taken seriously.
Final notes
To wrap up the above, there are actually just three things I wanted to say when making this table: First, "how to connect back" should be considered together with "what machine to buy"; don’t wait until it is set up to find out you can’t connect. Second, no route is absolutely better; first check whether your home can obtain a public address, then check what you mainly use it for. Third, enabling remote access and security are two sides of the same coin; convenience and security have always involved trade-offs.
For the actual troubleshooting step, this site has written the following, which you can read alongside:No speed change after broadband upgrade: check one by one from the ONT / optical modem to the network card(first get a clear picture of the fundamentals of your home connection),3000M broadband is here: first check whether your home’s upstream is sufficient(upstream is the real bottleneck for remote access),How to choose a home NAS: think through these three things first(how the machine’s openness affects what you can do later).
The solution principles, the charging start dates for vendors’ remote services (fnOS FN Connect has charged for remote access since July 2025; source: public product descriptions and entry records), and official security tips mentioned in the article have all been checked against public sources; prices are subject to each vendor’s official current price, and I have not written fixed numbers. I have not conducted a speed comparison of several solutions under exactly the same conditions; judgments involving experience are based on public materials—treat them as reference, not conclusions.
All article index · Back to homepage
Advertisement · This article contains affiliate links
If you want to get hands-on, you need a machine first
The following commands and services all require a server that stays online long-term.
Alibaba Cloud server campaign entry →
If you’re not sure what configuration to buy, read this first:How to choose a personal cloud server (configuration, bandwidth, renewal price)
If you purchase through this link,I will not charge you any extra fee(the affiliate commission is settled by Alibaba Cloud); the price shown on the order page is the actual payment price. The model, price, and campaign rules are subject to what is displayed on the Alibaba Cloud page; this article does not promise any discount level and does not constitute purchasing advice.